 PLN
PLN BRL
BRL CZK
CZK EUR
EUR EUR
EUR EUR
EUR EUR
EUR GBP
GBP RUB
RUB SEK
SEK USD
USD


Moulding on a wall – DIY installation tips
Moulding on a wall is often associated with nobility, as it was commonly used to decorate mansions, palaces and royal chambers. It was especially popular in the Baroque and classicist periods. There’s no better decorative solution if you want your living room to feel a bit more chic and aristocratic. Although it may seem like a job for an expert at first glance, moulding installation is also not that difficult.
Since it has been a staple of interior décor for several centuries, it’s safe to say that moulding is timeless and never becomes passe. We recommend this solution for anyone who prefers inherently stylish decorations to volatile passing trends.

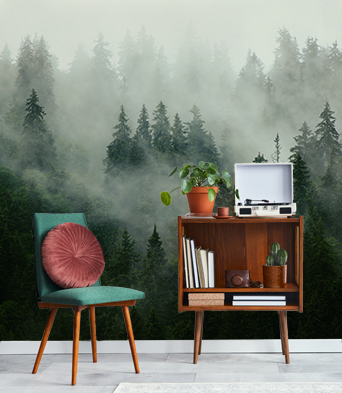
Decorative posters framed in moulding trims can completely transform your interior – myloview.com
Moulding on a wall – you can do it yourself
It is often very surprising how different an interior can feel thanks to a single decorative element. Decorative wall moulding panels are a recipe for a complete décor makeover. It’s a single day of work that guarantees a glamourous interior for many years to come. Of course, you can hire an expert to install it for you, but if you have a knack for DIY, you’ll be able to get the job done yourself.
If you’re wondering how to use moulding on walls, this short guide has everything you need to know. Most importantly, you have to purchase the right moulding panels and prepare a set of necessary tools. As long as you’re focused and precise, you don’t need any prior experience. The devil is in the detail, so make sure you’re not taking any shortcuts when installing your decorative wall mouldings.
Here are the tools you’ll need
There are a few tools which are absolutely essential when it comes to installing mouldings on a wall. Luckily, the shopping list isn’t that long and you can find the necessary items in any hardware shop:
-
a hot glue gun (or a pneumatic nail gun for wooden panels),
-
a level,
-
a metre measure,
-
a pencil,
-
a hand saw with fine teeth,
-
a mitre box (it’s not essential but it will make the job much easier),
-
masking tape,
-
paint,
-
decorative wall moulding panels.
Hardware stores offer a wide variety of moulding trims. In the past, mouldings were made exclusively out of plaster. Even though you can still find plaster trims and wall cornices today, they are oftentimes quite pricey, heavy and difficult to install. Luckily, there are many modern alternatives you can opt for.

You need to be very precise when installing crown moulding, so sometimes it’s better to use simpler and more modern alternatives
One of the most popular choices are polystyrene wall panel moldings. They are affordable and very light, which makes cutting and installation much easier. One disadvantage of polystyrene wall trims is that they can easily be chipped or dented, so it’s best to install them somewhere out of reach, e.g. right under the ceiling.
Instead of polystyrene, you can use polyurethane and wooden trims, which are more durable and resistant to humidity, or wood-based ones, made of plywood or MDF. These solutions will require a bit more work when it comes to installation. Regular glue may not be strong enough to hold up the mouldings, so you’ll most likely need to nail the trims to the wall.
Once you have all the necessary tools, you can begin designing your elegant wall decorations. Read on to learn how to install wall panel moldings step by step!
See also: How to wallpaper corners? A step-by-step guide
How to use mouldings on walls? Step-by-step instruction
There are many ways to use mouldings for decoration. In this article, we focus on the most common solution, which is arranging thin moulding panels into rectangular shapes. Fans of elegant, classic interiors may also enjoy wider, milled panels known as coving, which are installed right under the ceiling, or stunningly beautiful ceiling medallions, which are typically found around chandeliers. These artistic details can fill any interior with Baroque-style opulence.
We divided our instruction into 5 steps. The first three steps are obligatory, as they describe the actual process of installation. The other two are optional, but they will greatly improve the final effect.

Before installing decorative trims, remember to prepare the necessary tools and plan everything out
-
Plan out the layout of trims on the wall
To ensure that mouldings look good on a wall, plan out their layout before you begin installation. It’s best to draw it out on a piece of paper. Measure the height and width of the wall and plan the placement of your decorative moulding boxes evenly across the surface. Make sure the gaps between the boxes are even. Keep in mind also the gaps between boxes and the ceiling, the floor and other walls. You can use as many or as few of these decorative rectangles as you wish.
Once you have the project ready, use a level and a metre measure to put it into practice. It’s always a good idea to double check all the measurements, since uneven wall panel mouldings look really messy and unesthetic.
-
Cutting wall panel moldings to the right size
The next step is cutting the trims to the right size. In order to create rectangles, you have to cut the panels at a 45 degree angle. Precision is key here. To make the job easier, we recommend using a mitre box. Simply place the panel inside the box and slide the saw through the appropriate slots. The box will hold the saw at exactly 45 degrees while you cut the trim and ensure that the panels connect at right angles.
-
Install decorative wall molding panels using glue or nails
Before you begin installation, make sure to prepare the wall. Moulding panels will stick to the wall better if you degrease the surface beforehand or at least clean it with a wet cloth to get rid of dust. Cover the moulding panel with glue. We recommend using a glue gun with a thin nozzle for more precision and control. Next, press the mouldings against the wall in the designated spaces and hold it in place for the glue to dry (in accordance with the information on the glue packaging).

You can install mouldings using glue or nails, but remember that the effects may vary depending on which you choose
If you chose to use wooden trims, you’ll need to nail them to the wall. We definitely recommend using a nail gun instead of a hammer. If you make a mistake when cutting the panels, you can always fill in gap with acrylic compound.
-
Paint the mouldings in a different colour
In order to make your decorative wall moulding panels more appealing, you can paint them in a different colour. White trims look best on white walls, but they can also be used to contrast grey, emerald and pastel surfaces. Contrastive colours are especially recommended for spacious interiors, because the mouldings will then make the room feel more dynamic. In smaller interiors, the trims should match the colour of the walls or you risk overloading the room with dominant decorations. It’s a modern solution that has become very trendy recently.
-
Complete the décor with a patterned wallpaper
Moulding on a wall can be paired with other decorations for added effect. You could, for instance, use a beautiful wallpaper. One amazing idea is to use moulding panels as frames for the wallpaper. This elegant yet subtle solution works especially well if you use wallpaper with floral or geometric motifs. Since you’re not wallpapering the entire wall, the décor will remain light and refreshing. This is especially helpful when decorating smaller interiors.

Highlight the charm of your decorative mouldings thanks to a stylish wallpaper that matches the décor – myloview.com
If possible, make sure that the moulding-framed wallpaper matches the overall style of the room. Use a pattern with roses in a romantic interior, an Art Deco motif in a glamour space and a Victorian design in an eclectic flat.
You may also like: How to cover a hole in a wall? Learn the best solutions
Now you know how to install wall mouldings on your own
Decorative trims will instantly make your interior feel more elegant and sophisticated. This centuries-old solution can bring a whole new quality to any space. Even though the decoration seems subtle at first glance, it can completely transform the room. Whether you use classic white trims, paint them in a different colour or fill the mouldings with a wallpaper, the effects are sure to be stunning!
If you’re looking for more wallpaper designs, be sure to visit our store!
Wyświetl ten post na Instagramie


Other articles

